I am LOVING my crown molding templates! They make installing crown molding so much easier. I just can’t believe that Sandra didn’t tip me off to that little trick a few years ago when I was installing 500 sf of crown molding. Come on, help a sister out!

But even with Sandra’s easy templates, getting perfect corners can still be a challenge. Walls and ceilings are frequently out of square, and then there are vaulted ceilings, dah, dah, daaaaaaah (cue scary music)! Let’s face it, sometimes gaps happen. So for those times when your moldings don’t line up perfectly and you have gaps, lightweight spackle can be an easy fix. Note: This is for painted moldings only. If you have wood molding that you are going to stain, this is not the fix for you.

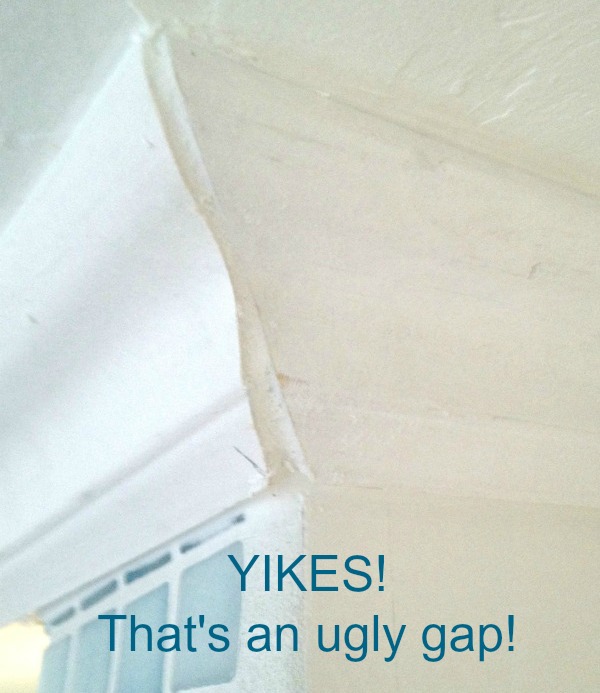
My upstairs bath has a sort of wonky double sloped ceiling. I experimented with a couple of techniques to install crown on a vaulted ceiling, transition pieces and corner blocks, but my vault is so mild that they just looked odd. I decided to force the corners by altering the spring angle and ripping a new bevel angle. This worked out great on the inside corners, but the outside corners were another story! After a couple of hours of running complicated mathematical models (OK I used a pre-made spread sheet), making test cuts, and about 10 feet of wasted crown, I used the test angles that fit the best and knew that I was just going to have to fix the cracks. I am a bit uncomfortable exposing my bare crack in public, but here goes:

I know, Scary, but with a little caulk and light weight spackle, no one will ever know. OK I guess everyone who sees these pics will know, but you get the idea.
Start by caulking the molding as per usual, and include a bead of caulk in the gap. This will stabilize the molding. Don’t worry about trying for a cosmetic fix with the caulk, just fill the void and let dry.

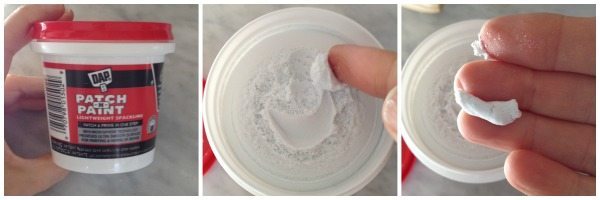
Next use lightweight spackle, I like Dap’s Patch –n- Paint. It has the texture of a stiff meringue and seems like it will be too delicate to work, but this stuff is awesome! It is moldable (OK it’s not modeling clay, but you can get it to conform to a molding profile pretty easy), and the edge can be feathered to blend really well. It is sandable, but retains a bit of flexibility so it won’t crack and chip out over time, and it doesn’t shrink.

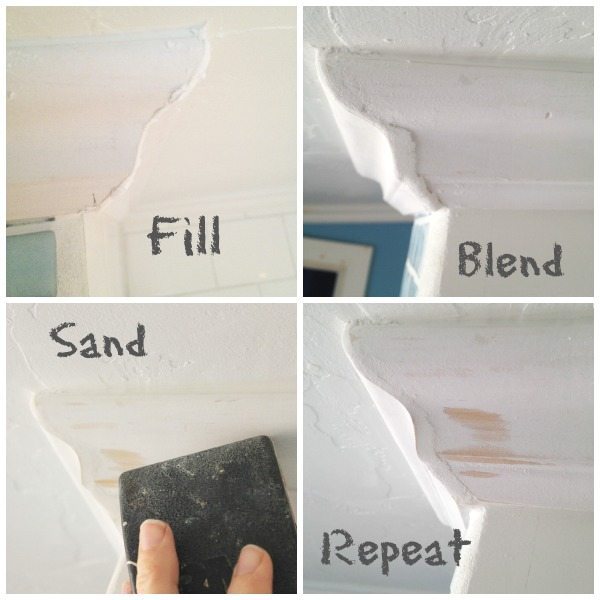
I start by making a series of small balls or snakes that I press into the gap leaving the spackle proud. Then gently blend. Work quickly, as the spackle dries it will begin to stick to your fingers and is less toolable. Don’t try for perfection just the general shape and let dry. After the patch has dried use sandpaper to continue tooling and refining the patch. Repeat until you are happy with the look. If the spackle you are using needs to be primed it is a good idea to prime between coats so that you don’t re-imulsify the first coat as you add more. Dap’s Patch-n-Paint doesn’t need to be primed, Hallelujah for one less step!
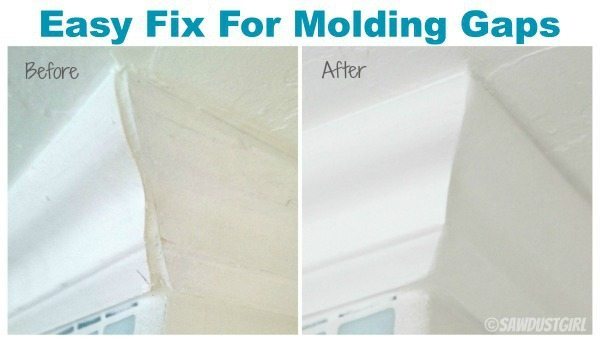
Now paint your moldings and watch that ugly gap disappear! Is it perfect? NO, but as long as no one is going to be looking at your molding with a telephoto lens, it is pretty darn good!
Use Lightweight Spackle to Fix Molding Gaps is a post from: Sawdust Girl.com All Rights Reserved. Copyright 2014.


